Let the pink radish flowers bloom on your plate with this Quick Pickled Watermelon Radish! This Japanese pickled radish uses the Kazarigiri technique to transform beautiful pink watermelon radish into a cute flower shape. Tart and whimsical pickled radishes are a beautiful addition to sushi, salad, and avocado toast!

If you're into Japanese radish recipes, also try the Daikon and Honey Syrup recipe!
[feast_advanced_jump_to]What is Kazarigiri?
Kazarigiri (飾り切り) is the traditional Japanese technique of decorative vegetable carving. Vegetables are carved into flowers and auspicious symbols, used for entertaining and showing hospitality.
Kazarigiri vegetables are not only festive and lovely, it helps vegetables soak up flavor and hold their shape while simmering.
One of the iconic Kazarigiri is Nejiri Ume (ねじり梅), which is a shape of plum blossom! While complex carving can take practice, this quick pickled watermelon radish flower is the perfect entry point for beginners to practice Kazarigiri at home.
Kazarigiri transforms your regular recipe into a festive feast. I love making Kazarigiri vegetables for Japanese traditional cultual holiday like Shogatsu (Japanese New Year) and Hinamatsuri (ひな祭り, Girls' Day). I make various Kazarigiri every year to make Osechi Ryori, Japanese New Year food.

Why Use Watermelon Radish?
Watermelon Radish is heirloon type of Chinese Daikon Radish. It looks like a light green root vegetable from the outside, but beautiful magenta pink flesh is hidden inside!
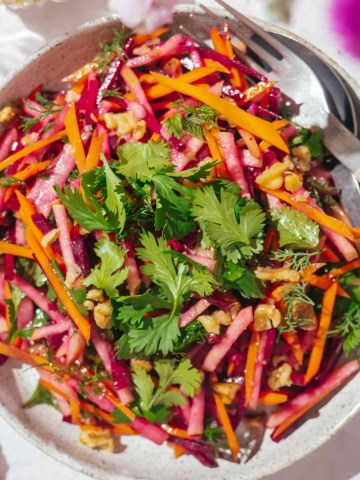
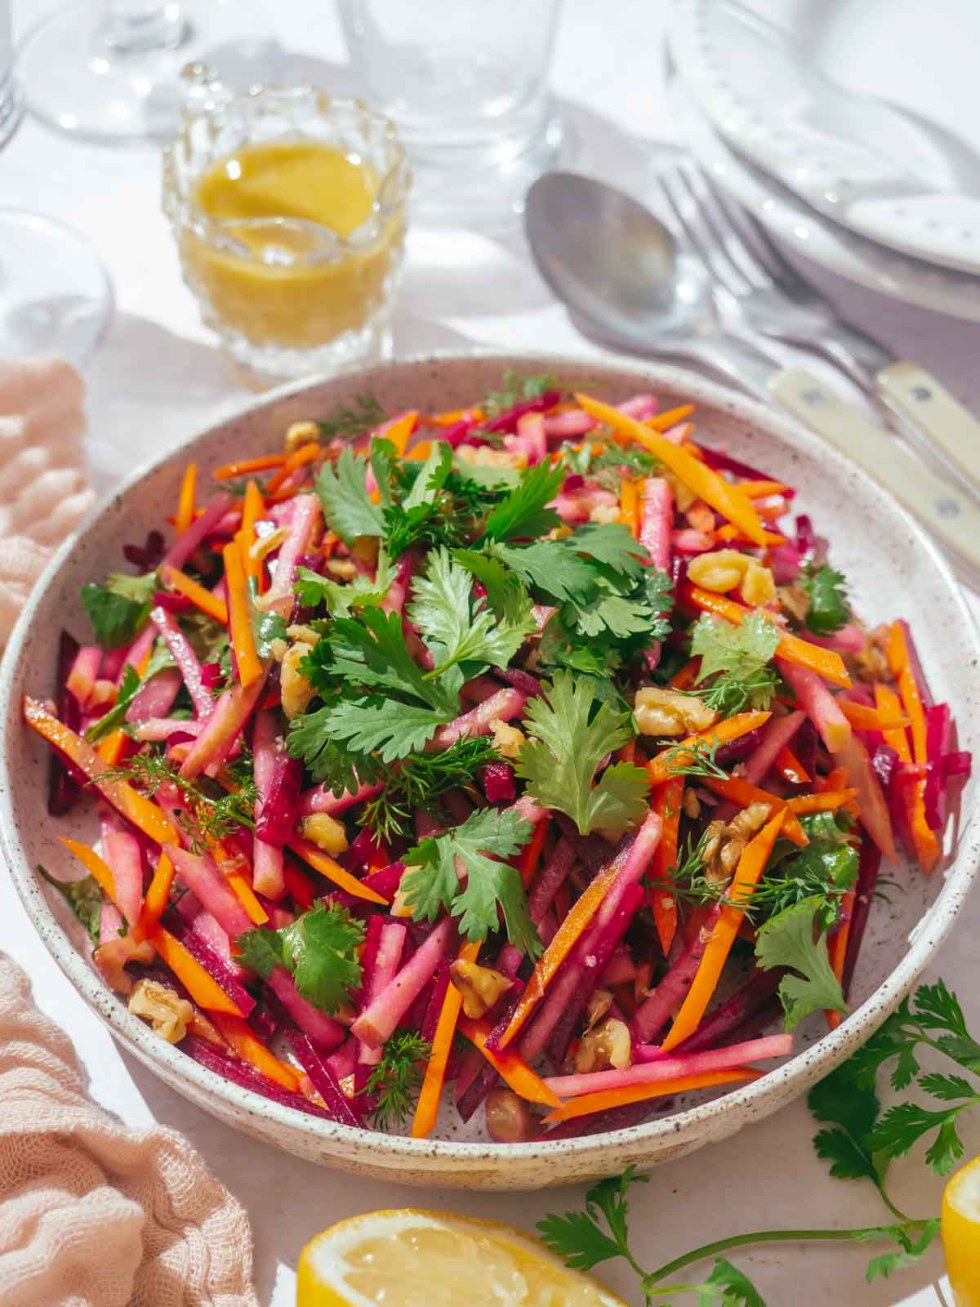
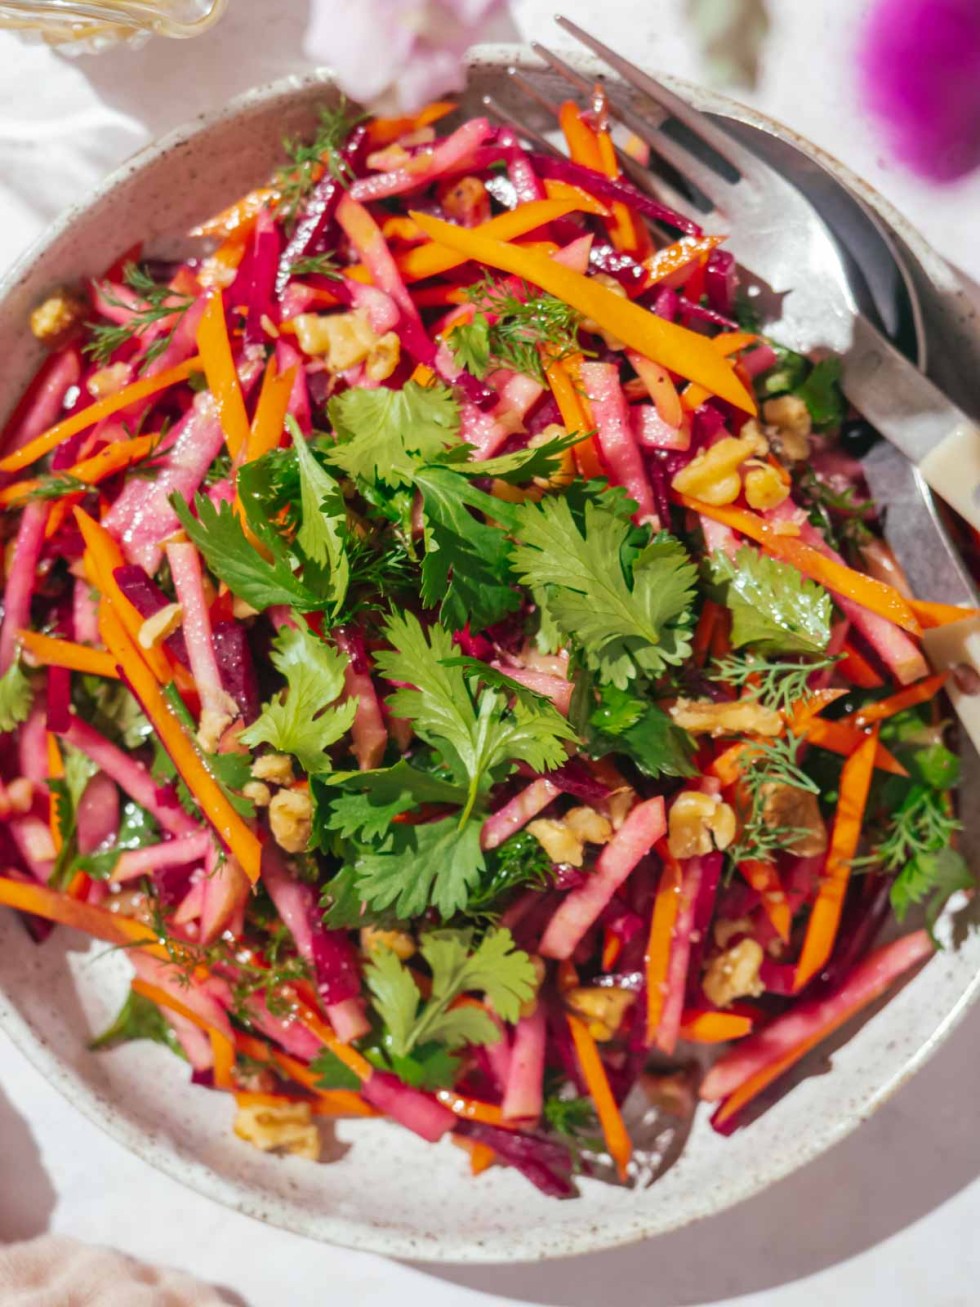
The gorgeous pink hue and crisp, tender texture are great for salads. But raw watermelon radish can be slightly peppery. Pickling with vinegar softens the spiciness and brightens up the color to reddish pink.
This color change is due to anthocyanins, the natural pigment in watermelon radishes (and red cabbage or blueberries) that is responsible for their pop of color.
These pigments are highly sensitive to pH levels. When it's in the rice vinegar, the acidic environment triggers the color change from purple to pink/red.
Using watermelon radishes for quick pickle creates a bright, whimsical pink that is perfect for avocado toast, a festive salad, Osechi Ryori, and especially Chirashizushi (ちらし寿司, scattered sushi) on Hinamatsuri!
Ingredients and Substitutions for Japanese Pickled Radish
- Watermelon Radish: While the iconic magenta color of watermelon radish is mesmerizing, you can also use carrots, regular radish, and daikon.
- Rice Vinegar: Quick pickled vegatables make with rice vinegar is perect for sushi topping.
- Maple syrup: You can substitute with regular sugar.
- Sea Salt
Pro Tip: When using regular white daikon, pickle a few pieces of chopped red cabbage to make them pink! Red cabbage is also a great source of anthocyanins, a natural color pigment! If you want to enjoy the health benefits of anthocyanins, also try the Antioxidant Purple Ginger Immunity Shot!
Japanese Wellness Tip: While a simple rice vinegar brine works beautifully, I like adding 1-2 Tablespoons of homemade Shio Koji, instead of sea salt, to the pickling liquid. It acts as a natural flavor enhancer and adds a deep, fermented umami.
Equipment
You need a vegetable cutter to cut a cute flower shape out of the radish. You can get flower-shaped cutters at Amazon!
How to Cut and Pickle Watermelon Radish Flowers

- Slice: Use a sharp knife to slice the watermelon radish into 1cm (a little thinner than ½ inch) thick rounds.
- Punch: Use a small plum flower-shaped vegetable cutter to punch out shapes. (Alternatively, use a paring knife to cut five small "V" notches around the edge and round the pointed tips to create a blossom petal effect).
- Shape: Score the 2-3mm deep cuts between petals from the edge to the center, deep on the edge, and shallow to the center. To create the 3D petal effect, shave off the edges from the center toward the outside (sogitori) to create a beautiful slope. Angle the knife at the center of the petal, then slice off the surface downwards to the cut between the petals. Repeat with all the petals. *For visual guidance, watch the step-by-step video in the recipe card below.
- Brine: In a small jar or sealable bag, combine rice vinegar, maple syrup, and a pinch of salt. mix well.
- Pickle: Submerge the radish flowers in the brine. The color will transform into a vibrant pink! Let it sit for at least 15 minutes.
- Serve: Use immediately as a topping for Chirashizushi or store in an airtight jar in the refrigerator and enjoy within 3-5 days.
Quick Version: If you decided to skip the kazarigiri process, simply cut the radish rounds into thin quarters (bite-sized triangles). If the sliced radishes overflow in your jar or aren't fully submerged in the brine, try using a sealable bag (like a Ziploc). Gently massage the brine and radish together, then seal tightly while squeezing out the air to ensure every slice is completely submerged.
Ways to Use Your Pickled Radish Flowers
These are the perfect quick-pickled watermelon radish for sushi, but there are way more recipes you can add!
- Sushi Topping: These pickled radish flowers are the beautiful finishing touch for Chirashizushi (scattered sushi) during Hinamatsuri, New Year, or anytime you need a touch of festive spirit. They also look stunning on top of a simple tuna or tofu poke bowl.
- Breakfast Toast: Try these on avocado and hummus toast. Tangy pink pickled radish pairs beautifully with a rich spread on toast.
- Salad: Make your salad bloom! Crispy Rice Salad is a great base for this recipe.
- Cute Side Dish: Serve 3-4 flowers on a small Mamezara plate as Tsukemono with your dinner as a palate cleanser. Serve with protein, rice, and miso soup to enjoy a traditional Japanese meal.

Storage
Because this is a quick pickle recipe (and we are skipping the salting step to keep that fresh crunch!), these are best enjoyed within 3 to 5 days.
More Japanese Wellness Recipes
By pickling watermelon radish in rice vinegar, you are creating a simple, healthy meal and adding antioxidants to your plate. If you're building a holistic wellness routine, these pink flowers are a perfect companion to:
- How to Use Koji (Japanese Fermentation Culture): Learn how to use the Japanese hodden flavor-making ingredient.
- Immunity Ginger Shot Ice Cubes: For a daily morning ritual that works from the inside out.

Quick Pickled Watermelon Radish Flowers
Ingredients
- 1 watermelon radish
- ¼ cup rice vinegar
- 1 tablespoon maple syrup or regular sugar
- Pinch salt
Instructions
- Slice: Use a sharp knife to slice the watermelon radish into 1cm (a little thinner than ½ inch) thick rounds.
- Punch: Use a small plum flower-shaped vegetable cutter to punch out shapes. (Alternatively, use a paring knife to cut five small "V" notches around the edge and round the pointed tips to create a blossom petal effect).
- Shape: Score the 2-3mm deep cuts between petals from the edge to the center, deep on the edge, and shallow to the center. To create the 3D petal effect, shave off the edges from the center toward the outside (sogitori) to create a beautiful slope. Angle the knife at the center of the petal, then slice off the surface downwards to the cut between the petals. Repeat with all the petals. *For visual guidance, watch the step-by-step video below.
- Note: For a quicker version, skip the carving and thinly slice the radish into quarter-moons.
- Brine: In a small jar or sealable bag, combine rice vinegar, maple syrup, and a pinch of salt. mix well.
- Pickle: Submerge the radish flowers in the brine. The color will transform into a vibrant pink! Let it sit for at least 15 minutes.
- Serve: Use immediately as a topping for Chirashizushi or store in an airtight jar in the refrigerator and enjoy within 3-5 days.
Video
Notes
Nutrition
For more recipes and updates, follow me on Instagram, TikTok, Facebook, or Pinterest!
If you enjoy the recipe, please leave a comment and ⭐️⭐️⭐️⭐️⭐️! I'd love to know what you think!